Microsoft Copilot Studio is changing quickly, and the latest update brings one of the most important user interface overhauls so far. If you build copilots, automations, or AI agents, this Copilot Studio UI Update will impact you, and understanding these changes now will help you deliver better solutions faster and stay ahead of upcoming Microsoft Ignite announcements.
This guide explains the new Copilot Studio interface, how agent creation has changed, what’s new with workflows, how computer use agents work, and how GPT‑5.1 and other models fit into your agents. It’s written for active Copilot Studio users who want practical, search-friendly information they can act on immediately.
Why the New Copilot Studio UI Matters Now
Every October–November, Microsoft delivers Wave 2 updates across Power Platform and Dynamics 365. Copilot Studio has been a major focus in this release cycle, with:
- A redesigned home and agent creation experience
- Stronger emphasis on workflows and automation
- Deeper integration of new GPT models, including GPT‑5.1
These changes are also landing right before Microsoft Ignite, where we can expect more announcements about Copilot Studio capabilities, AI models, and automation features. On the very day this video and transcript were recorded (November 13), OpenAI announced the GPT‑5.1 model family, and Microsoft quickly made GPT‑5.1 available inside Copilot Studio.
If you’re serious about Copilot Studio, this is the moment to understand how the product is evolving so you can design agents and flows that take full advantage of the new capabilities.
Watch the Video
If you prefer watching over reading, we've got everything from this article covered right here in this video:
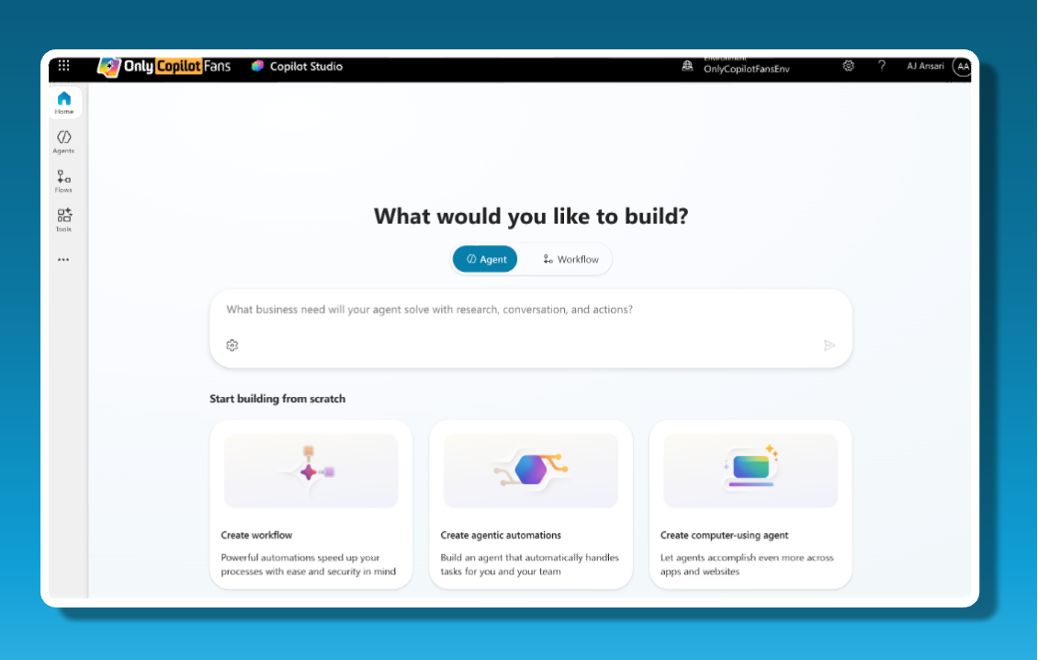
The New Agent Creation Experience: From “Create” to “Describe” and “Agentic Automations”
In the classic Copilot Studio home screen, most users are used to clicking “Create” to start a new agent. That button is now gone in the new interface, and this is where many users get confused at first.
Instead, the new experience centers around:
- “Create agentic automations”
- A dedicated “Describe” area
These two paths define how you create agents going forward.
Fast creation: “Create agentic automations”
The “Create agentic automations” option opens directly into a new agent, bypassing the older wizard-like flow. You no longer have to:
- Describe the agent in a separate screen
- Step through multiple “configure, Playground, test” pages
- Click through a wizard before you can start building
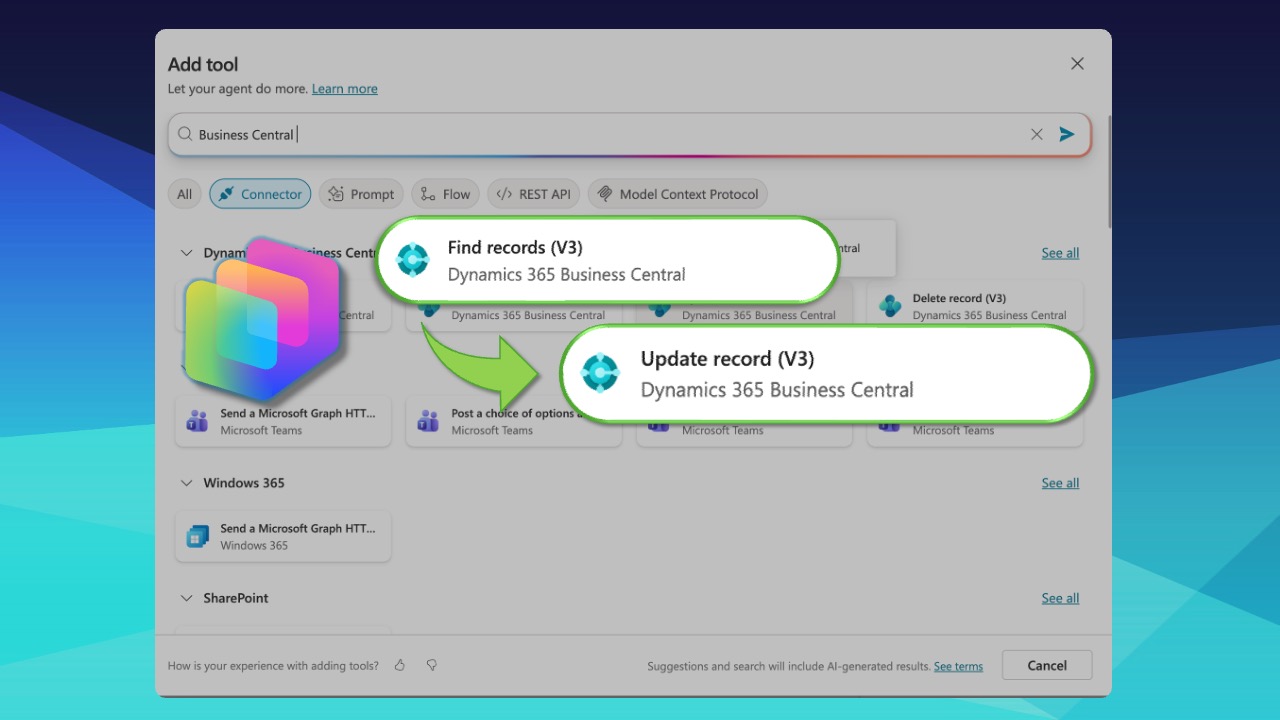
This is ideal if you already know what you’re doing and want to get straight into:
- Writing system instructions
- Setting up tools and knowledge sources
- Configuring channels and triggers
If you’re an experienced Copilot Studio user, this becomes the quickest way to stand up a new agent and start iterating.
Guided creation: “Describe” to generate an agent
For users who still want the classic guided approach, the Describe entry point takes over that role.
Here, you define your agent in natural language. For example:
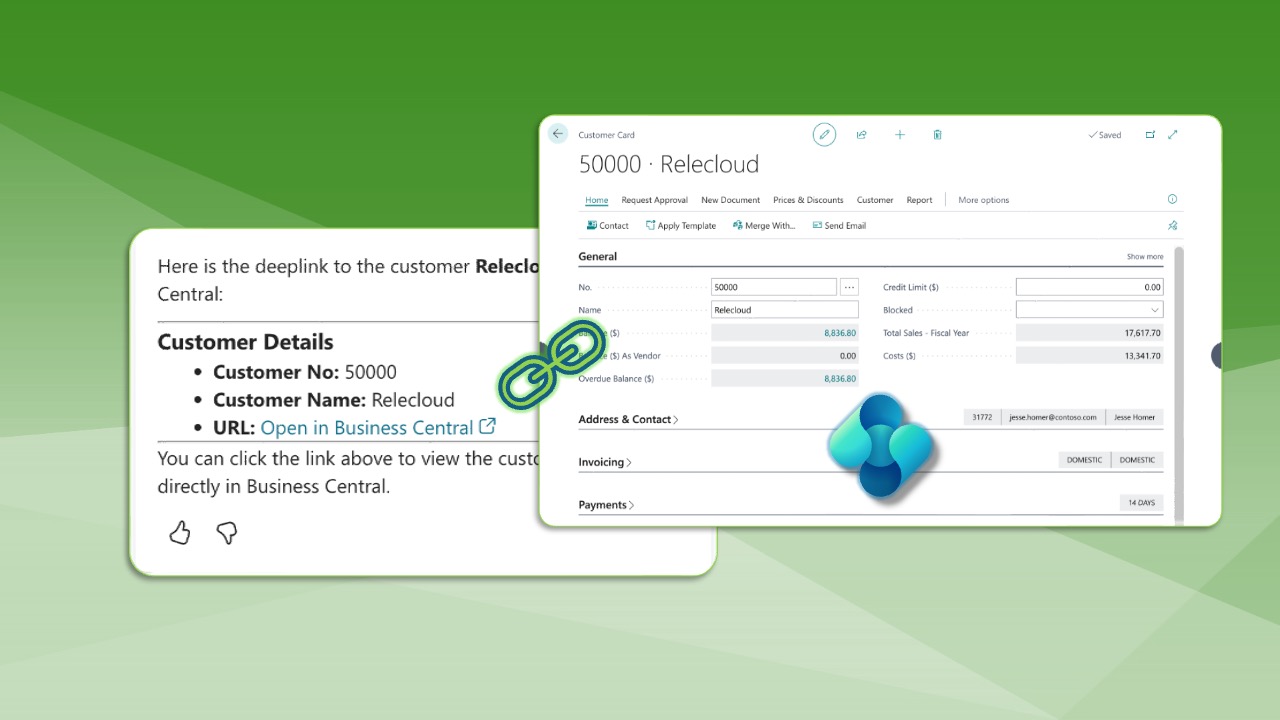
“You are a financial analyst and will help analyze general ledger information from Dynamics 365.”
From that description, Copilot Studio walks you through:
- Agent persona and description
- Language selection
- Basic configuration and behavior
- Optional Playground testing
If you are onboarding new team members or want more structured guidance, the Describe path is the closest equivalent to the older “Create + wizard” experience, updated with more powerful settings.
New Describe Settings: Language, Schema, and Solution Placement
The updated Describe screen adds a small but important improvement: a gear icon that opens advanced configuration options. These settings make it easier to align your agents with your broader Power Platform and ALM practices.
From this gear icon, you can configure:
- Default language for your agent
This ensures your agent starts in the correct language instead of relying on post-creation changes. - Schema name
A consistent schema name helps you maintain naming standards across environments and solutions, which is crucial in multi-team, multi-project implementations. - Solution selection
You can choose which Solution your agent belongs to right from the start. This is a best practice if you manage Copilot Studio agents as part of a structured solution with proper lifecycle management, versioning, and deployment.
For Copilot Studio users working in professional or enterprise environments, this combination of language, schema, and solution choice is a meaningful quality-of-life upgrade.
Workflows in Copilot Studio: More Than Agent Flows
One of the most important changes in this new UI is how workflows are positioned.
Previously, many users treated Copilot Studio “flows” as agent-only automations that:
- Start with a trigger like “When an agent calls a flow”
- End with “Respond to the agent”
In the new interface, workflows are more prominent and clearly capable of much more. You can now build full workflows inside Copilot Studio that look and feel like Power Automate flows, including:
- Multiple trigger types
- Rich branching and logic
- A wide range of connectors and actions
What’s particularly important for Copilot Studio users is how licensing and capabilities are aligned:
- Copilot Studio workflows run under the Copilot Studio plan or an Azure pay-as-you-go model.
- You can use premium connectors within Copilot Studio without needing separate Power Automate premium licenses in many scenarios.
This positions Copilot Studio as a central place not only for conversational agents but also for complex, connector-rich workflows. Over time, this may push more automation work into Copilot Studio, with Power Automate and “agent flows” blending even further.
If you are designing automation-heavy copilots, this makes Copilot Studio workflows a strategic tool to standardize on.
Computer Use Agents (CUA): Automating the User Interface
Another key feature that becomes more approachable in the new UI is the computer use agent capability, often abbreviated as CUA.
Computer use agents are designed to:
- Interact directly with graphical user interfaces
- Click buttons and controls
- Perform multi-step tasks in desktop applications and web interfaces
In the new interface, you can use a dedicated entry point: “Create computer using agent.”
When you select this:
- Copilot Studio creates an agent for you automatically.
- You are taken directly into a computer use prompt experience.
- You describe the steps and behavior the agent should automate.
There are a few important notes for users:
- Current documentation indicates computer use is supported on Windows, not macOS.
- If you want to experiment with computer use and you are on a Mac, consider using a Windows 365 or other Windows environment.
For scenarios where APIs or connectors do not exist, computer use agents can become a powerful way to extend Copilot Studio into UI-driven processes that traditionally required RPA-style automation.
GPT Model Updates: GPT‑4.1, GPT‑5.1, and Retired Models in Copilot Studio
Behind the scenes, Copilot Studio’s power comes from its integration with leading large language models. The new UI surfaces a more modern set of models and changes the default behavior for new agents.
In many existing agents in standard environments, you may still see configurations such as:
- OpenAI's GPT‑4., even though it is a retired model. Copilot Studio allows you to keep using retired models for a limited time (for example, 30 days) to support mission-critical agents while you transition to newer models.
For newly created agents, the default has shifted to GPT‑4.1, giving you:
- Better performance and quality compared to older GPT‑4.0 setups.
- A smoother transition to the latest supported OpenAI models.
Depending on your environment and configuration, you’ll also see options such as:
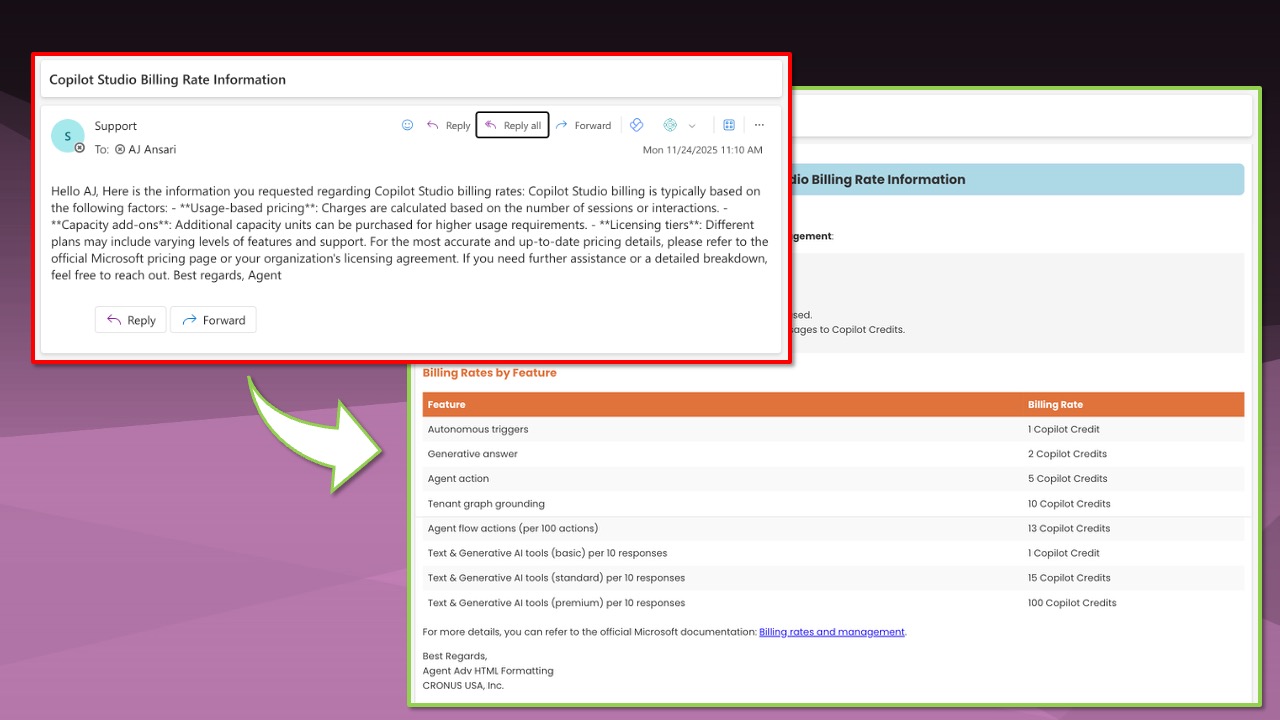
- GPT‑5 auto
- GPT‑5 reasoning
- External models like Claude Sonnet 4.5 and Claude Opus 4.1 (UPDATE: As of November 27, 2025, Claude Opus 4.1 has been replaced by the newly announced Opus 4.5 model)
In preview environments that include the newest UI and features, you’ll see even more:
- GPT‑5.1 chat
- GPT‑5.1 reasoning
This matters because:
- New agents benefit from more capable, more efficient models by default.
- Behavior differences between older and newer agents may be driven by model changes.
- You should regularly review which model each agent is using, especially before major changes or high-impact deployments.
If you want your copilots to be more accurate, responsive, and aligned with current AI capabilities, it’s worth standardizing on GPT‑4.1 and GPT‑5.1 where appropriate and gradually migrating away from retired models.
Standard vs. Early Release: How to Get the New Features
You may notice that your Copilot Studio environment does not yet show the new UI or GPT‑5.1 options. That’s likely because you’re in a standard release environment rather than an early release or preview one.
To access preview features safely, you can create a dedicated early release environment:
- Open the Power Platform admin center.
- Go to Manage.
- Create a new environment.
- Choose Developer if this environment is for testing and development.
- Enable “Get new features early.”
This environment will:
- Include the new Copilot Studio interface.
- Provide access to new features like the updated Describe experience, expanded workflows, and GPT‑5.1 models.
- Allow you to test and refine your solutions before rolling changes into production.
For teams that rely on Copilot Studio, this approach gives you the best of both worlds: stability in production and early access to innovation in a safe sandbox.
Next Steps: See the New Copilot Studio UI in Action
The Copilot Studio UI update is more than a cosmetic change. It reflects a deeper shift toward:
- Faster, direct agent creation for power users
- Rich, Power Automate–like workflows inside Copilot Studio
- Easier access to computer use and UI automation
- Immediate use of new models like GPT‑5.1 within your agents
If you want to get the most value from Copilot Studio right now:
- Explore the new agent creation paths and decide when to use “Create agentic automations” versus “Describe.”
- Start treating workflows in Copilot Studio as first-class automation assets, not just agent helpers.
- Experiment with computer use agents for UI-driven processes, especially in Windows environments.
- Review and update your agents to run on GPT‑4.1 or GPT‑5.1 instead of relying on retired models.
- Set up a preview environment with “Get new features early” to test future changes before they hit production.
Action item: To fully understand these changes and see them in context, watch the full Copilot Studio UI walk-through video on YouTube. The video visually demonstrates the new interface, agent creation paths, workflows, computer use agents, and GPT‑5.1 model options, so you can quickly recognize them the next time you open Copilot Studio and confidently apply what you’ve learned here.
Author and AI Assistance Disclosure
This article is based on my original YouTube video walkthrough of the new Copilot Studio UI and feature updates. I used AI to help turn the video transcript into a structured, edited article, but the explanations, observations, and recommendations are my own and reflect my personal experience working with Copilot Studio.
Recommended Artices
If you enjoyed this article, check out some of these: