Copilot Studio
 M365 Copilot
 Copilot Cowork
 Autopilots
 Governance

If you're into creating Agents with Copilot Studio, chances are each Agent will serve a different purpose. But there are some foundational skills that every Agent would benefit from having. Folks who work with Power BI will relate to this idea, because regardless of what your Semantic Model and Reports are going to do, you will almost always start with a date table if you want to be able to zoom in and out of time periods.
So let's start with some background on what Agents cannot do out of the box.
This might come as a surprise to you because AI is supposed to be smart, but your Agent doesn't have the ability to tell you what the date and time are! It kinda-sorta has this information but much of it is buried in environment variables which aren't surfaced in user interactions. It will either tell you it doesn't know, or on occasion for some weird reason, I've found that it will mix up the date. For instance on 1/10/2025 (MM/DD/YY), it told me the date was October 1, 2025 because it parsed the information incorrectly as DD/MM/YY.
So without further ado, here are three skills you would do well to add to all of your Agents:
Skill 1: Give your Agent some Starter Prompts
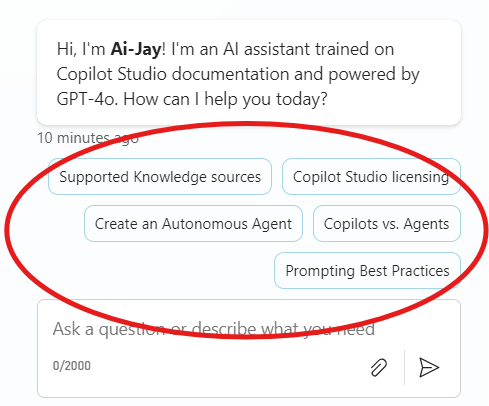
For those who are unaware of what Starter Prompts are, those are some example prompts shown in bubbles that can give the user an idea of the types of questions your agent can answer or teach them how a prompt should be written.
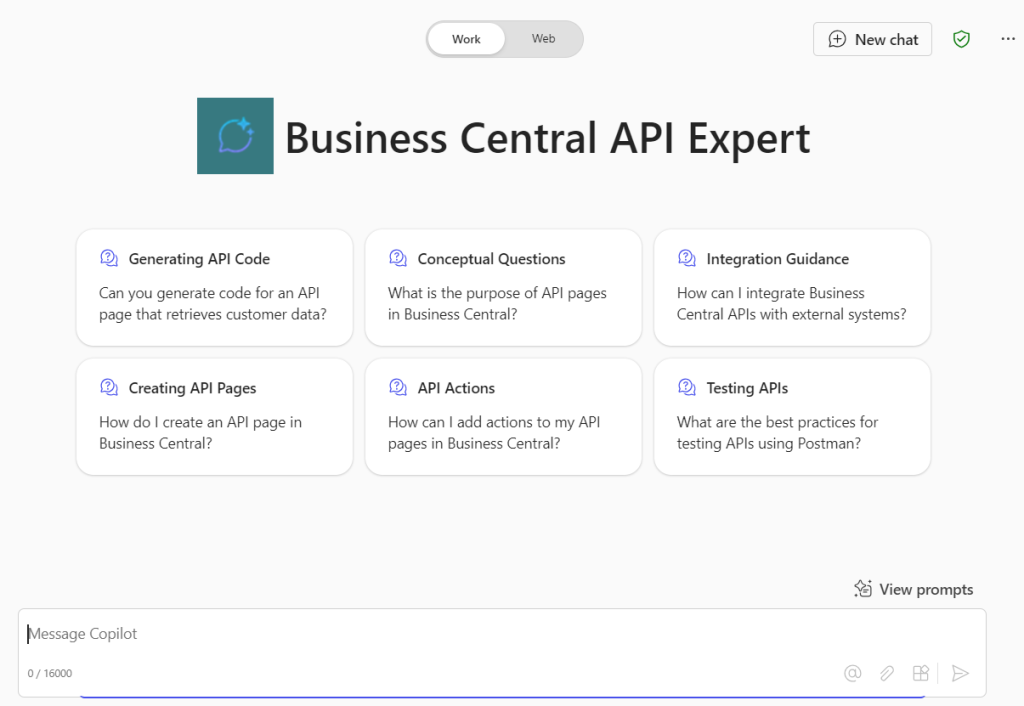
This may seem like a D-UH thing, but as of January 2025, not every type of agent supports Starter Prompts. At this time, only declarative Agents support it (i.e., Agents that are created for Copilot BizChat aka Copilot Business Chat).
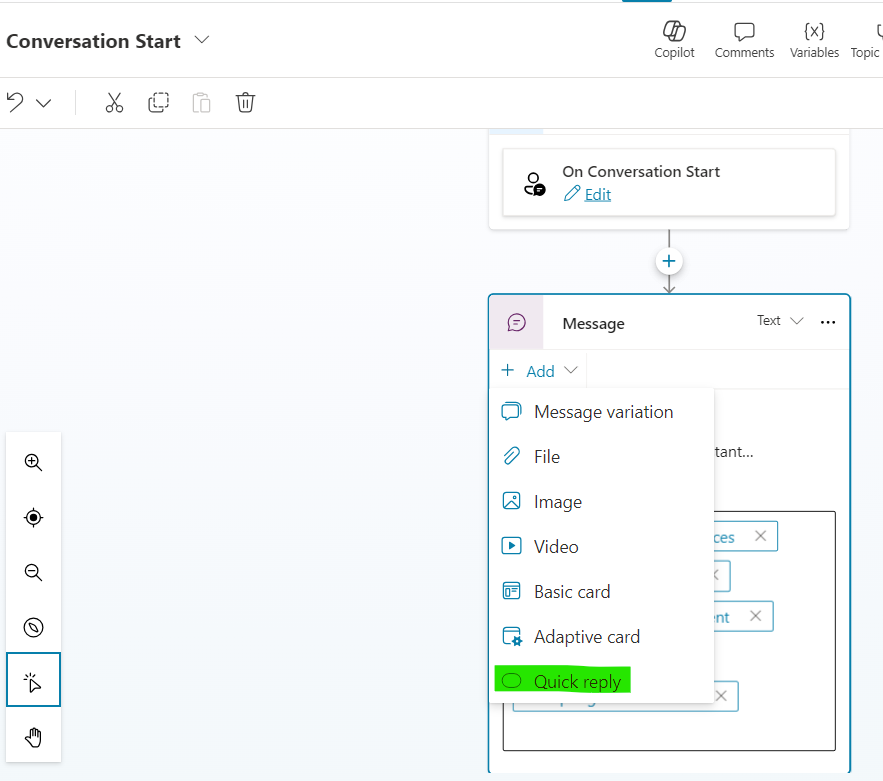
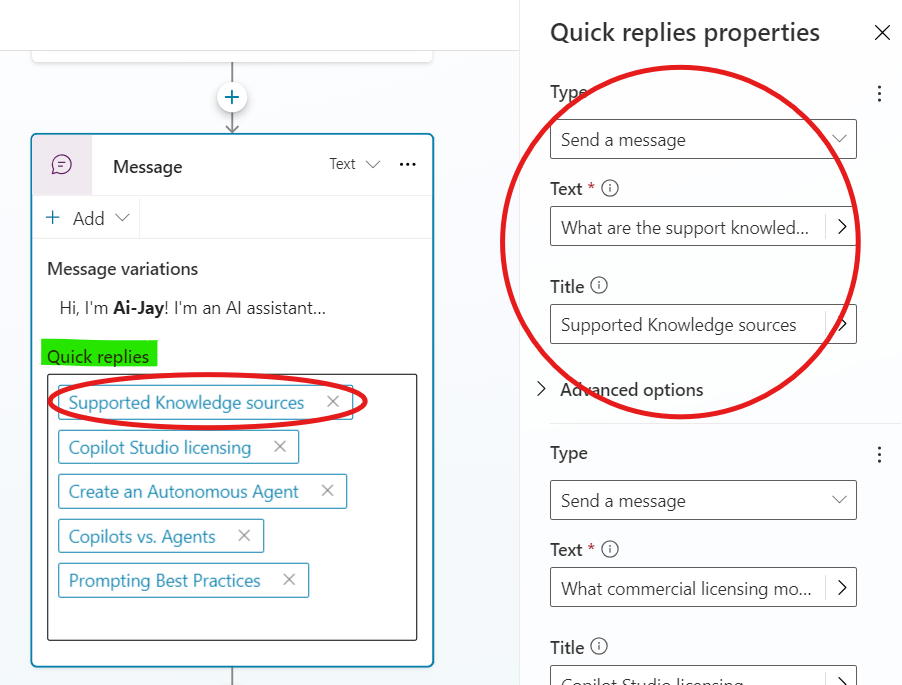
So how do you add Starter Prompts when you're creating standalone Agents that will be deployed on Teams, a website or a different channel? Simple! Edit the Conversation Start Topic and add some Quick Answers to the main Message node. For each quick answer, you can add a short title, and in the Text field, you can type in the full prompt. All the quick answers you add will show up below the initial greeting at the start of the conversation.
Skill 2: Teach your Agent the date, time and time zone
There are a few ways to do this.
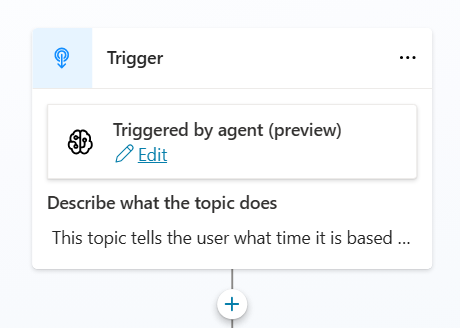
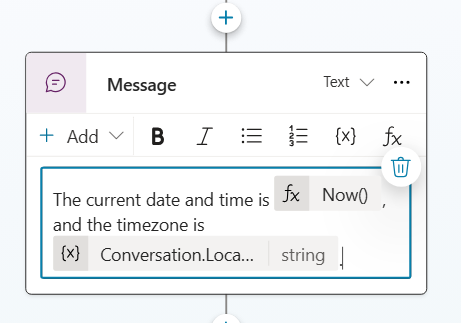
One is to use information from the Agent's own system variables. For this, you'll need to create a Topic. Give it a name like Time and Date Topic. Be sure to give it a meaningful description like "This topic tells the user what time it is based on the user's current timezone." in the Triggered by Agent node.
Add a message node with a simple message like: The current date and time is fx.Now() and the timezone is {x}.Conversation.LocalTimeZone.
When you prompt it for time, it will give you all the information you need (see screenshot below).
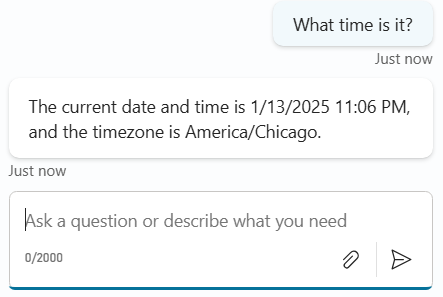
If the response you're getting is for the wrong timezone or incorrectly offset, see these instructions from Microsoft Learn.
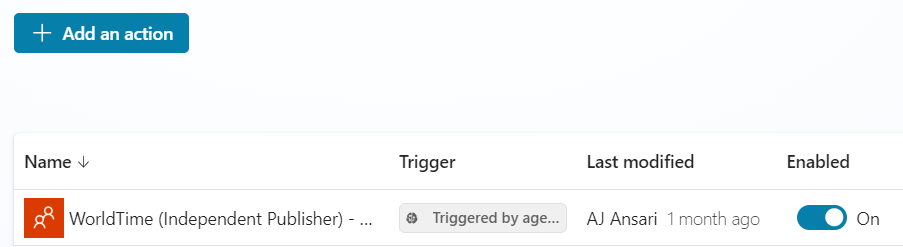
Another way involves using an Action with a connector like WorldTime (Independent Publisher), that a Get current time based on IP action. This one is free, but there are also some that require a subscription. When using Actions with GenAI orchestration, you won't need to populate any inputs or outputs. Copilot Studio is smart enough to figure those out. The first time someone asks for the time, it'll prompt them for their IP address. While there are ways around it, this is the non-invasive way and ensures you have the user's consent. The user can get their IP from whatismyip.com and type it in, and for the rest of the conversation, your agent will be able to tell the date, time and time zone.
Sidenote: If you want the agent to always use a specific time zone or date/time format, you can add those as bullet points in the Instructions of your Agent. For example, the instruction related to time zone could be:
- Any questions related to time should be answered in Central Standard Time unless otherwise requested
You can type a similar instruction for the desired date or time format.
Skill 3: Teach it to send an email with Office 365 Outlook or Gmail
Why would you want this skill for your Agent? Simple: It will make it easy for the user to send themselves or someone else the information they receive from the Agent. Depending on the Channel you deploy your Agent to, the user may not have a way to go back and look at the chat history once the conversation ends (e.g., if your Agent is deployed on a website).
Adding this skill is simple. Just as we did for the previous skill, all you need to do is create an Action. But some planning and forethought will be needed here.
For starters, who will be using your Agent? Will your agent require them to be authenticated (in Teams, Copilot BizChat, etc.) or can anyone access it from a website without a login?
Then decide if outbound e-mails should be sent using the authentication of the "author" of the Agent (i.e., use one predefined e-mail address like a customer service e-mail for all outbound mails) or the authentication of the "user". If it's the latter, they will need to enter their credentials the first time they are sending an e-mail in the conversation and the "from" address will the user's e-mail.
Also, depending on the e-mail system you are using, choose between Office 365 Outlook (this for both O365 and M365 for businesses, enterprise, education, government, etc.; what Microsoft calls "Work or School" login), or Gmail.
If you choose Office 365, make sure you pick the Action titled Office 365 Outlook – Send an email (V2). You do not need to configure any of the inputs or outputs.
In the Details of the Action, I recommend populating the Description for the agent to know when to use this action field with the following instruction:
This operation sends an email message. When a user asks you to create or send an e-mail, always show what you will send and ask for confirmation from the user before it is sent. Follow the user's guidance to determine if the message needs to be changed before sending.
This will make the Agent show you the fully formatted e-mail as a chat message and ask for your confirmation before it sends the e-mail. In my experience, I have found that this "ask for confirmation" instruction works most of the time but occasionally it gets ignored.
Other things I strongly recommend are adding instructions in the main Instructions area of the Agent (under Overview) to add:
Each of the bullet points above are hyperlinked to articles I previously posted here on OnlyCopilotFans.com explaining how it's done.